Quick Answer
Three DIY methods: (1) Stock tank + ice, ~$350 total, best for occasional use and testing the habit; (2) Stock tank + external chiller, $800-$1,500, best for daily use without the ongoing ice expense; (3) Chest freezer conversion, $300-$600, the most energy-efficient approach and the only one that reaches near-freezing temperatures without a high-cost chiller. The Rubbermaid 150-gallon stock tank is the single best platform for methods 1 and 2.
Reviewed by
Dr. Renée Halvorsen, PhD
Exercise physiologist. 11 years researching cold-water immersion at NTNU. Author of The Cold Protocol (Penguin, 2024).
Verified Expert38 articles
Cost comparison at a glance
| Method | Setup Cost | Monthly Running Cost | Target Temp | Best For |
|---|
| Stock tank + ice | $320-$400 | $50-$150 (ice) | 45-58°F | Occasional use, testing the habit |
| Stock tank + chiller | $750-$1,500 | $15-$35 (electric) | 48-58°F | Daily users, moderate climate |
| Chest freezerMost efficient | $300-$600 | $8-$20 (electric) | 39-55°F | Cold climates, energy efficiency |
| Commercial cold plunge | $1,200-$10,000+ | $15-$45 (electric) | 39-104°F | Convenience, support, aesthetics |
The four DIY build routes compared
Beyond the three methods detailed below, most DIY plunges come down to four vessel choices: a stock tank, a converted chest freezer, an IBC tote, or an inflatable tub paired with a chiller. Each trades off differently on cost, how cold it gets, build effort, and how long it lasts. The table below sets them side by side so you can pick a starting point before reading the step-by-step builds. For a deeper dive on the two most popular routes, see our stock tank cold plunge build and chest freezer conversion guide.
| Build Route | Vessel Cost | Min Temp | Build Effort | Durability |
|---|
| Stock tank + chillerBest all-round | $130-$320 | ~45°F | Moderate (drill + plumb) | 10-20 yrs |
| Chest freezer conversion | $200-$350 | ~39°F | High (seal + wire) | 3-7 yrs |
| IBC tote + chiller | $150-$250 | ~45°F | Moderate (cut + plumb) | 5-10 yrs |
| Inflatable + chiller | $100-$400 | ~40°F | Low (plug and play) | 1-4 yrs |
Min temp assumes a properly sized chiller (or the freezer compressor) with an insulated vessel. A stock tank is inherently watertight and lasts decades, while a chest freezer needs its seams sealed and its compressor is not built for the humidity a plunge creates. Inflatables are the fastest to set up but the shortest-lived. Sources: Sun Home Saunas, Icebound Essentials, PlungeCoach (linked below).
Method 1
Stock tank + ice
Setup cost: $320-$400 | Running cost: $50-$150/month | Time to cool: 20-40 min
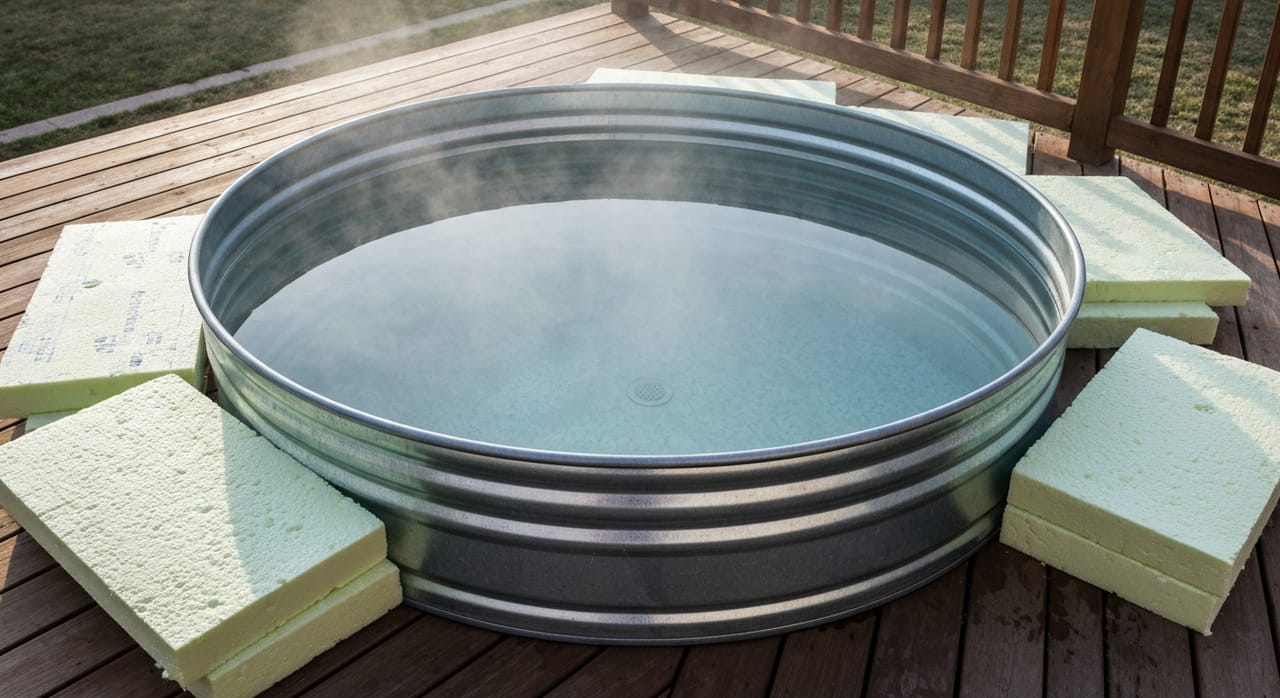
The simplest and cheapest cold plunge setup. A Rubbermaid 150-gallon stock tank filled with water and ice gets you to 50-58°F quickly and requires no plumbing, electrical work, or mechanical skill. The main ongoing cost is ice.
What you need
Rubbermaid 150-gal stock tank
~$320
Tractor Supply, Rural King
Digital thermometer (waterproof)
$15-$25
Amazon
Insulated cover / lid
$40-$80
Amazon (search "stock tank cold plunge cover")
Ice per session (40-80 lbs)
$15-$40
Gas station, grocery store, Reddy Ice delivery
01
Set up the tank
Place the tank on a flat, level surface that can support 1,250+ lbs of water (150 gallons at ~8.3 lbs/gallon). Outdoors on concrete or compacted gravel is ideal. Ensure the drain plug is on the downhill end for easy water changes. Do not place on a wooden deck without confirming the structural capacity.
02
Fill with cold water
Fill the tank with a garden hose. If your tap water is already cool (55-65°F in winter or early spring), the amount of ice needed is dramatically reduced. In summer, tap water at 75°F requires significantly more ice. Fill to approximately 6 inches from the top to leave room for displacement when you enter.
03
Add ice and monitor temperature
Add ice 15-20 minutes before your session. For 150 gallons starting at 75°F, reaching 55°F requires approximately 60-80 lbs of ice. Stir the water with your arm or a paddle to distribute temperature evenly. Check with your thermometer every 5 minutes. The temperature will drop faster initially and slow as ice melts.
04
Add water care
For ice-only setups with 2-3 day water changes, basic hydrogen peroxide maintenance suffices: add 15-20 ml of 3% hydrogen peroxide per session to inhibit bacteria. For weekly changes, add a cartridge filter and pump. Test pH every 3-5 days and maintain 7.2-7.6 with pH adjustment products.
Method 2
Stock tank + external chiller
Setup cost: $750-$1,500 | Running cost: $15-$35/month | Time to cool (first cooldown): 2-4 hrs
Adding an external chiller to a stock tank eliminates the ongoing ice cost and effort, maintains precise temperature automatically, and works indefinitely without water changes as long as filtration and sanitation are maintained. This is the most popular setup for daily cold plungers who want the DIY cost savings of a stock tank with the convenience of automatic cooling.
What you need
Rubbermaid 150-gal stock tank
~$320
Tractor Supply
Active Aqua 1/4 HP Chiller
~$400
Amazon, Happy Hydro
Submersible pump (300-500 GPH)
$25-$60
Amazon (Vivosun, EcoPlus)
3/4" vinyl tubing (10 ft)
$10-$20
Amazon, hardware store
Through-hull fittings (2x)
$15-$25
Amazon (3/4" barbed)
Cartridge filter (submersible)
$25-$50
Amazon
01
Drill and install through-hull fittings
Using a 1" hole saw, drill two holes in the stock tank: one near the top edge (return line - chilled water re-enters here) and one near the bottom (suction line - water exits to the pump). Install 3/4" barbed through-hull fittings with washers on both sides and marine-grade silicone sealant. Allow 24 hours to cure before filling.
02
Connect the chiller and pump
The submersible pump sits inside the tank and pushes water through the outlet fitting, through tubing, through the chiller's heat exchanger, and back in through the inlet fitting. Most Active Aqua chillers include a flow rate specification - match your pump's output to the chiller's recommended GPH. For the 1/4 HP Active Aqua, 200-400 GPH is the target range.
03
Set the target temperature
The Active Aqua chiller has a digital controller. Set your target temperature - 50-55°F is the standard range. The chiller will run the compressor until it reaches the set point, then cycle on and off to maintain it. Initial cooldown from tap temperature takes 2-4 hours for 150 gallons. Subsequent sessions are ready immediately since the chiller maintains temperature between uses.
04
Add filtration and sanitation
A submersible cartridge filter in-line with the pump removes particulate. Add an ozone generator or 20-30 ml of 35% food-grade hydrogen peroxide per 100 gallons for sanitation. With this setup, water changes are needed every 2-4 weeks. Test pH weekly (target 7.2-7.6). Check and replace the filter cartridge every 2-4 weeks.
Method 3
Chest freezer conversion
Setup cost: $300-$600 | Running cost: $8-$20/month | Target temp: 39-55°F
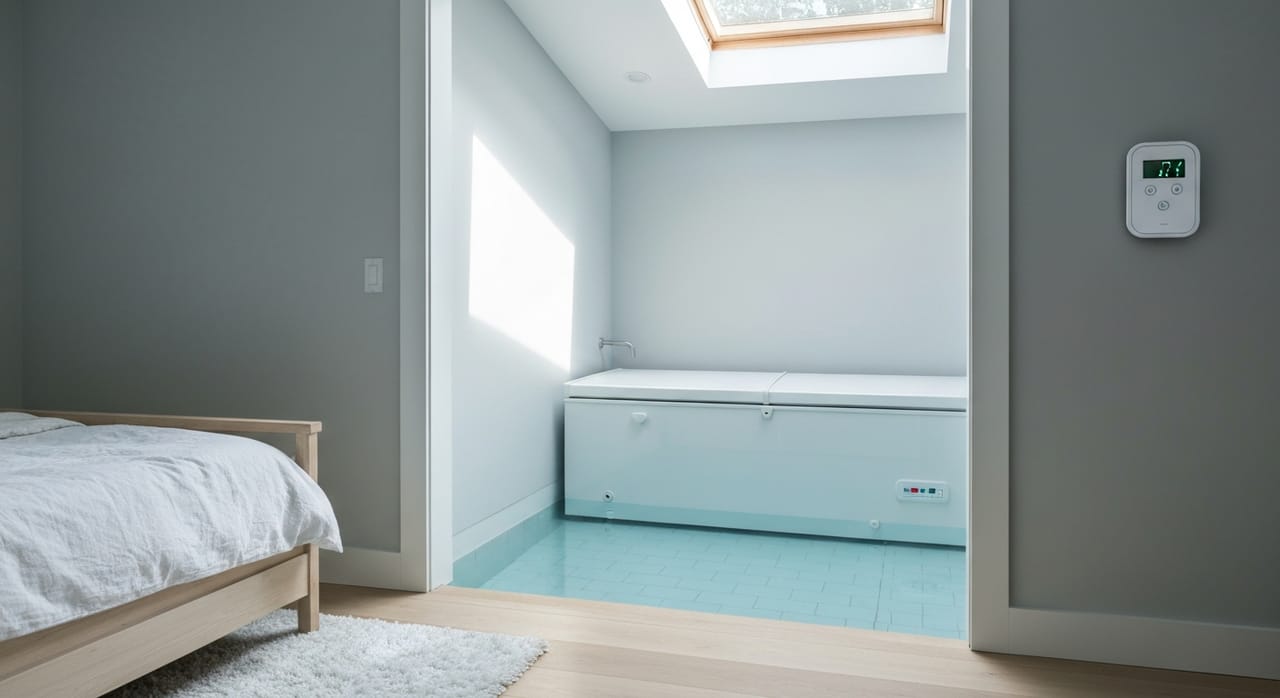
Converting a chest freezer to a cold plunge is the most energy-efficient DIY approach and achieves the lowest temperatures without an expensive external chiller. A 7-10 cubic foot chest freezer ($200-$350 at Home Depot, Lowe's, or Costco) is waterproofed and used as the tub. A temperature controller prevents the water from actually freezing.
What you need
Chest freezer (7.0 cu ft)
$200-$350
Home Depot, Lowe's, Costco, Walmart
Inkbird ITC-308 temperature controller
$35-$50
Amazon
Food-safe silicone sealant
$10-$15
Hardware store (GE Sealants, DAP)
Pool drain plug (1" or 1.5")
$5-$15
Amazon, pool supply store
Submersible pump (200-300 GPH)
$25-$40
Amazon
GFCI outlet (required)
Use existing GFCI circuit
Required by electrical code
01
Choose and prepare the freezer
A 7.0-9.0 cubic foot chest freezer is approximately 2.5 feet wide by 3.5-4 feet long - enough for most adults to sit with knees slightly bent. Remove the interior liner screws and inspect all seams. The interior is typically coated metal or ABS plastic, both of which seal well with silicone. A chest freezer drain hole may already exist - this becomes your drain port. If not, drill a 1" hole at the lowest interior point.
02
Seal all seams and install drain plug
Apply food-safe silicone sealant (GE Advanced Silicone or similar) to all interior seams, corners, and any holes except the drain. For the drain, install a pool-style rubber expansion plug from the inside. Allow silicone to fully cure (24-48 hours) before testing. Test the seal by filling with 5-10 gallons and waiting 30 minutes. Address any leaks before proceeding.
03
Set up the temperature controller
Plug the Inkbird ITC-308 into a GFCI outlet. Plug the chest freezer into the "cooling" socket on the Inkbird. Set the target temperature to your desired plunge temperature (50-55°F is standard). The Inkbird's probe goes into the water. When water temperature rises above your set point, the Inkbird powers the freezer until the target is reached, then cuts power. This prevents both freezing and overworking the compressor. Do NOT plug the freezer directly into the wall without the controller - the compressor will run continuously and the water will freeze.
04
Add circulation and water care
A submersible pump (200-300 GPH) prevents cold pockets and ice formation. Run it continuously or on a timer. For water care in the confined chest freezer space, ozone is not practical (too small). Use hydrogen peroxide: 20-30 ml of 3% H2O2 per session, or 5-8 ml of 35% food-grade H2O2 per 100 gallons every 3-4 days. Change water every 2-3 weeks. Check pH weekly.
Electrical and GFCI safety for powered builds
Any build with a chiller, a pump, or a converted freezer combines water and electricity, so the wiring is not optional detail. Get this right before the first fill. The single most important rule: every powered cold plunge component must be protected by a ground-fault circuit interrupter (GFCI). A GFCI cuts power in milliseconds if current leaks to ground, which is exactly the failure mode you face when a person sits in water next to a compressor.
Non-negotiable rules
- →GFCI protection is mandatory. The 2023 National Electrical Code section 210.8(F) requires GFCI protection on outdoor residential outlets, and any outlet near water needs it regardless of location.
- →Keep the outlet at least 5 feet from the water's edge. Code requires a minimum separation between a receptacle and the water.
- →Use a dedicated circuit sized to the equipment. A typical chiller runs on a 120V circuit; larger units may need 240V. Match wire gauge to the load and the manufacturer spec.
- →Give a chest freezer its own GFCI circuit. Freezer compressors and defrost heaters are known to cause nuisance GFCI trips, so do not share the circuit with other loads.
- →When in doubt, hire a licensed electrician. NEC Article 680 covers pools, spas, and hot tubs and a pro will make sure your build complies.
A quick note on nuisance trips. If your GFCI keeps tripping on a chest freezer build, the cause is usually the compressor motor or a defrost heater developing a small ground fault as condensation forms on cold components. This is a real signal, not just an annoyance: the humidity a plunge creates works into electrical connections that were never designed for it. Keep the electrical box dry, route cords so water cannot pool at a plug, and inspect connections regularly. If trips continue, stop using the build until an electrician checks it.
For wiring a chiller specifically, our DIY cold plunge chiller guide covers circuit sizing, pump matching, and installation in detail.
How to make a cold plunge tub: the full weekend build
Build: stock tank + chiller | Time: one weekend + 24 hr cure | Cost: $900-$1,400
This is the long version of Method 2, written as an order of operations you can follow start to finish. It is the build most people mean when they search for how to make a cold plunge tub: a stock tank, two bulkhead fittings, a pump, a filter, a chiller, and a GFCI circuit. The sequence below is assembled from fitting manufacturer installation specs, published NEC requirements, chiller sizing data, and DIY build write-ups rather than a build we ran ourselves, so check every component against its own manual before you drill anything.
If you want more depth on any single stage, the stock tank cold plunge walkthrough covers the vessel, the DIY cold plunge chiller guide covers sizing and wiring, and how to keep cold plunge water clean covers everything after commissioning. Building into a freezer instead? Go to the chest freezer conversion guide.
01
Plan and site the tub
Pick the spot before you buy anything. A filled 150-gallon tank holds roughly 1,250 lbs of water at 8.34 lbs per gallon, closer to 1,400 lbs with a person in it, spread over about a 72 by 30 inch footprint. Concrete, a paver base, or compacted gravel all work. A wooden deck needs its load capacity confirmed by a builder first. Check three things at the same time: the tank sits within reach of a hose bib, there is a GFCI-protected outlet within cord reach but at least 6 feet back from the water, and there is 12 to 18 inches of clear air on the chiller side so the condenser can exhaust heat. A chiller boxed into a corner loses capacity for no reason.
02
Buy the parts and dry-fit everything
Order the tank, chiller, pump, filter, bulkheads, hose, clamps, sealant, and foam board in one pass so you are not stopping mid-build (full checklist in the next section). Before drilling, lay the whole loop out on the ground in the order water will travel and confirm the hose barb sizes actually match: a 3/4 inch pump outlet, 3/4 inch hose, and 3/4 inch bulkhead thread are not automatically the same fitting. Note the hole size your specific bulkhead calls for. A 3/4 inch bulkhead has roughly a 1.38 inch outside diameter and typically wants a 1-1/2 inch hole, while many packaged cold plunge fitting kits ship 1.75 inch bulkheads that need a 1.75 inch hole saw. Use the number printed on your fitting spec, not a generic one.
03
Mark and drill the two holes
Mark the suction hole low, about 2 to 4 inches up from the inside floor, so the pump keeps prime as the water level drops. Mark the return hole high, roughly 4 to 6 inches below the intended waterline, and put it on the opposite end or the far side so chilled water sweeps the length of the tank instead of short-circuiting straight back to the suction. Drill with a sharp hole saw at low speed and light pressure. Structural foam and polyethylene grab and crack if you force the saw. Deburr both holes with a knife or sandpaper until the edge is smooth, then wipe out every shaving so nothing sits under the gasket.
04
Fit the bulkheads and let them cure
A bulkhead fitting seals with its rubber gasket, not with sealant. The gasket goes on the wet side, inside the tank, flat against a clean wall. Push the threaded body through from the inside and run the lock nut on from the outside. Hand tighten, then add only a light turn with a wrench or channel locks. Over-tightening is the standard failure here: it cracks the flange on plastic fittings and thin tank walls, and a cracked flange leaks forever. A thin bead of marine or food-safe silicone around the outside of the gasket is optional insurance, not a substitute for the gasket. Give sealant 24 hours to cure before the tank sees water.
05
Plumb the loop in one direction
Water flows tub, then pump, then filter, then chiller, then back to the tub. Keep that order. The filter belongs upstream of the chiller so particulate never reaches the heat exchanger, and a $30 cartridge is trivial next to replacing a chiller that silted up. Run the shortest hose you can, avoid tight bends that kink, and double-clamp every joint on the suction side with stainless clamps, because a suction-side joint that leaks air will not drip water but will starve the pump. Match the pump to the chiller spec rather than buying the biggest pump: most 1/4 to 1/2 HP units want somewhere in the 200 to 500 GPH range, and many refuse to start the compressor until they see sustained minimum flow.
06
Insulate the tank, the lid, and the hoses
This is the step people skip and then blame the chiller for. Wrap the tank walls and floor in 2 inch rigid foam board and tape the seams with foil tape. XPS runs about R-4.5 to R-5.0 per inch, so 2 inches gets you close to R-10, and both XPS and EPS actually gain R-value as the mean temperature drops. Polyiso tests higher on the label (roughly R-5.6 to R-6.5 per inch at a 75°F mean temperature) but loses performance as it gets cold, which makes XPS the more sensible pick around a tub of 45°F water. Add a closed-cell insulated lid, because most of the heat gain on an open tub arrives from above, and slide foam pipe sleeves over both hose runs. Uninsulated hose in the sun works as a heat exchanger in the wrong direction.
07
Wire it through a GFCI, without shortcuts
Every powered part of this build sits within arm's reach of a person sitting in water, so ground-fault protection is not optional. The 2023 NEC section 210.8(F) requires GFCI protection for outdoor outlets at dwellings on single-phase branch circuits rated 150 volts or less to ground and 50 amps or less, which covers a backyard chiller. NEC Article 680, which governs pools, spas, and hot tubs, places the required receptacle no closer than 6 feet from the inside wall and no farther than 20 feet, and every 15 or 20 amp 125-volt receptacle within 20 feet of the water has to be GFCI protected. Give the chiller a dedicated circuit sized to its nameplate draw, keep plugs and any power strip off the ground and out of splash range, and test the GFCI with its own test button before the first fill. If the circuit does not already exist, this is the part to hand to a licensed electrician.
08
Fill, prime, and leak test before you walk away
Fill with a hose to just above the return fitting and stop. Start the pump and watch the two bulkheads, every clamp, and the chiller inlet and outlet for 30 minutes with a dry paper towel under each joint, since a slow weep shows up on paper long before it shows on the ground. Purge trapped air: with the pump running, briefly loosen the highest fitting or tilt the hose until the gurgling stops and flow goes quiet and steady. Only then top up to the working level, roughly 6 inches below the rim so your body does not overflow it. Fix any drip now. A bulkhead that seeps at fill pressure will not fix itself once the tub is cold.
09
Commission the chiller and set the temperature
Set the controller to something moderate for the first run, around 55°F, rather than straight to the coldest number. The first pull-down is by far the largest cooling job the unit will ever do: dropping 150 gallons by 30°F takes roughly 37,500 BTU (150 gallons x 8.34 lbs x 30°F), which is many hours of runtime on a 1/2 HP unit delivering in the low thousands of BTU per hour. Expect the compressor to run continuously through that first cooldown. That is normal on day one, and not normal on day ten. Once it holds the set point, drop it in 2 to 3°F steps over a few days and note how long each step takes, which gives you a real baseline for spotting trouble later.
10
First-run checks and the first week
Before the first plunge, run through this list: GFCI test button trips and resets; no drip at either bulkhead after a full cold cycle; pump runs quiet with no gurgle; thermometer in the water agrees with the chiller display within a couple of degrees; lid seals; cords routed so water cannot pool at a plug. In week one, check the filter cartridge after 3 to 4 days, because a new build sheds far more debris than a settled one, and log how long the chiller runs each day. Then start the water care routine: pump running daily, sanitizer on schedule, and pH held at 7.2 to 7.6.
From here the build is done and the routine takes over. Filter changes, sanitizer dosing, and pH are covered in how to keep cold plunge water clean, and if the chiller ever struggles to hold your set point, the sizing maths in the DIY cold plunge chiller guide will tell you whether it is the unit or the insulation.
Common build mistakes and how to fix them
Almost every failed DIY plunge fails in one of eight ways, and most of them trace back to a decision made before the first fill. Read this before you buy, not after.
| Symptom | What causes it | The fix |
|---|
| Chiller runs nonstop and never reaches the set point | Undersized for the volume or the climate. A chiller loses roughly 15-25% of its capacity as ambient temperature climbs from 70°F to 95°F, so a unit that is adequate in spring falls short in August. | Insulate the tank and lid before buying a bigger unit, since that is the cheaper fix. Shade the chiller and clear 12-18 inches of air around it. For 150 gallons outdoors in a hot climate, plan on 1/2 HP minimum and consider 1 HP. |
| GFCI trips whenever the compressor kicks in | Shared circuit, moisture in a plug or box, or a compressor developing a small ground fault as condensation forms on cold components. | Give the chiller or converted freezer its own dedicated GFCI circuit. Keep plugs off the ground and out of splash range. If trips continue, stop using the build until an electrician inspects it. Repeated trips are a real fault signal, not a nuisance to work around. |
| Water warms several degrees between sessions | Bare tank walls, no lid, and uninsulated hoses working as radiators in the wrong direction. | 2 inches of XPS on walls and floor (about R-10), foil tape on the seams, a closed-cell insulated lid, and foam sleeves on both hose runs. Insulation is the single highest return per dollar in the whole build. |
| Slow drip or weep at a bulkhead fitting | Gasket on the dry side instead of the wet side, a rough or oversized hole, or an over-tightened lock nut that cracked the flange. | Gasket inside, lock nut outside, hand tight plus a light wrench turn only. Deburr the hole before fitting. Replace a cracked fitting rather than trying to seal over it, because silicone will not hold against a split flange. |
| Pump gurgles, flow drops, chiller reports a flow fault | Cavitation. The pump is pulling air because the water is below the suction fitting, the filter cartridge is clogged, or a hose is kinked or leaking air on the suction side. | Top the water above the suction fitting, clean or swap the cartridge, straighten kinks, double-clamp suction joints, and purge trapped air with the pump running until the flow goes quiet. |
| Green tint, slick walls, cloudy water | Biofilm and algae from no circulation, no sanitizer, and an open tub sitting in daylight. | Run the pump daily, keep the cartridge filter in the loop, dose hydrogen peroxide or ozone on a schedule, hold pH at 7.2-7.6, and keep the lid on between sessions. |
| Cooling gets weaker over months, grit inside the loop | No filter ahead of the chiller, so skin cells, hair, and grit pack the heat exchanger. | Always plumb the filter between the pump and the chiller. A cartridge costs a few tens of dollars against a several hundred dollar chiller replacement. |
| Tank flexes, or the deck sags underneath | A filled 150-gallon tank is about 1,250 lbs of water plus body weight over a small footprint, and the load was never checked. | Site on concrete, pavers, or compacted gravel. On a deck or balcony, get the load capacity confirmed before filling, and consider dropping to a 100-gallon tank. |
Sources for this section and the walkthrough above: Eaton on 2023 NEC 210.8(F) outdoor outlets, NEC 680.22(A)(1) receptacle location, GreenBuildingAdvisor on rigid foam R-values, U.S. Plastic Corp on bulkhead hole sizing, Plunge Crafters on fitting installation, and ColdTubChiller on pump and flow faults.
Stock tank options
Rubbermaid structural foam tanks are the standard choice. They are BPA-free, UV-stabilized, and have proven durable in outdoor cold plunge use for years. Available at Tractor Supply, Rural King, and farm supply stores nationwide.
| Tank | Gallons | Approx Price | Dimensions (L x W) | Best For |
|---|
| Rubbermaid 100 gal | 100 gal | ~$210 | 72" x 24" | Seated position, smaller users |
| Rubbermaid 150 galRecommended | 150 gal | ~$320 | 72" x 30" | Most adults, fully reclined |
| Rubbermaid 300 gal | 300 gal | ~$470 | 89" x 46" | Multiple users, no advantage solo |
| Galvanized steel 100 gal | 100 gal | ~$130-$180 | Varies | Aesthetic - avoid with chlorine |
Chiller options for Method 2
Budget pick
Active Aqua 1/4 HP
~$400
2,500-3,000 BTU/hr. Sufficient for 100-gallon tanks in moderate climates (ambient under 75°F). Best value for cold plunge beginners moving off ice.
★ Budget pick for a smaller tankScore 8.2/10
Active Aqua 1/4 HP Chiller
Standard pick
Active Aqua 1/2 HP
~$600
4,020 BTU/hr. Handles 150-gallon tanks in any indoor climate and most outdoor summer use. Boost function for faster initial cooldown. The standard recommendation for most stock tank builds.
★ Most PopularScore 8.6/10
Active Aqua 1/2 HP Chiller
Which build is right for you
Cost, climate, and how often you plunge decide most of this. Read the profile that fits you.
You are testing the habit
Stock tank + ice
You are not sure cold plunging will stick, want the lowest upfront cost, and do not mind hauling ice. Roughly $350 to start. If it sticks, add a chiller to the same tank later. Read the full stock tank build.
Stock tank build guide →You plunge most days in a moderate climate
Stock tank + chiller
You want set-and-forget temperature with no ongoing ice cost, and you are comfortable drilling two holes and running a pump. The best all-round durability. $750-$1,500 total.
Chiller sizing and wiring →You want the coldest water for the least electricity
Chest freezer
You will plunge below 50°F, want the lowest running cost, and can seal seams and wire a controller carefully. Best in a garage or covered space, not exposed to freezing outdoor air. $300-$600.
Chest freezer conversion guide →You want fast setup or the cheapest vessel
IBC tote or inflatable
An IBC tote saves on the vessel if you can source a food-grade one; an inflatable plus chiller is the fastest plug-and-play route but the shortest-lived. Both still need a GFCI circuit for any powered cooling.
Compare chillers →Whichever vessel you choose, plan the water care from day one. A pump, a filter, and a sanitizer routine keep any DIY plunge safe between changes. Our guide on how to keep cold plunge water clean walks through the full system.
Maintenance schedule for DIY setups
Before each use
- →Rinse off before entering
- →Check thermometer reads
- →Add ice if below target (Method 1)
- →Visually check water clarity
Weekly
- →Test pH (target 7.2-7.6)
- →Add sanitizer dose
- →Wipe waterline with cloth
- →Check pump is running
- →Check filter flow rate
Every 2-4 weeks
- →Full water change
- →Deep scrub interior
- →Replace filter cartridge
- →Inspect fittings and seals
- →Clean chiller heat exchanger
DIY vs commercial: who should buy what
A DIY setup makes sense if you are comfortable with basic plumbing and electrical connections, prioritize cost savings over aesthetics, and do not need warranty support. The stock tank + chiller method delivers equivalent cold therapy to a $3,000 commercial unit for $750-$1,000 total.
A commercial cold plunge makes sense if you want a purpose-built, aesthetically finished product, need HSA/FSA-ready checkout (many DIY components don't qualify), want a full warranty, or value the integrated filtration and temperature control that commercial units provide out of the box. See our barrel plunge roundup or chiller hub for commercial options.
Frequently asked
How do you make a cold plunge tub?+
The most common build is a stock tank plus an external chiller. Set a 100 to 150 gallon stock tank on level ground that can carry the load (150 gallons of water weighs about 1,250 lbs before you get in). Drill two holes for bulkhead fittings, one low for the suction line and one high for the return, and fit them with the rubber gasket on the wet side and the lock nut outside. Run hose from the low bulkhead to a pump, through a cartridge filter, into the chiller, and back to the high bulkhead. Insulate the tank walls, the lid, and both hose runs, plug every powered part into a GFCI-protected outlet, then fill, leak test, and let the chiller pull the water down to your set point over several hours. Budget one weekend and roughly $900 to $1,400. The ice-only version skips the pump, filter, and chiller and costs about $350.
What do I need to build a DIY cold plunge?+
Seven things: a vessel, a pump, a filter, a chiller, plumbing, insulation, and a GFCI circuit. Concretely, a stock tank ($130-$320), a 1/4 to 1/2 HP water chiller ($400-$600), a 300-500 GPH pump ($25-$60), a cartridge filter ($25-$50), two 3/4 inch bulkhead fittings ($15-$30), 10 ft of 3/4 inch reinforced hose with stainless clamps ($20-$35), 2 inch XPS foam board and foil tape ($70-$105), an insulated lid ($40-$80), a digital thermometer ($15-$25), and a GFCI outlet or GFCI cord ($20-$45). Tools: a drill, a hole saw matched to your bulkhead spec, an adjustable wrench, a caulk gun, a 2 ft level, a deburring blade, and a plug-in GFCI tester. Nothing on that list needs a specialist tool beyond the hole saw.
Can you use a stock tank as a cold plunge?+
Yes, and it is the most popular DIY vessel for good reason. An agricultural stock tank is already built to hold water outdoors for years, the wall is rigid enough to drill and thread bulkhead fittings into, and the 150-gallon size (roughly 72 by 30 inches) lets most adults recline fully. Two cautions. The wall is thin and uninsulated, so wrap the outside in rigid foam if you plan to run a chiller, or the compressor will cycle far more than it needs to. And check what the tank is standing on: 150 gallons is about 1,250 lbs of water, closer to 1,400 lbs once you are in it, spread over a small footprint. Concrete or compacted gravel is fine, a wooden deck needs its load capacity confirmed first.
What is the cheapest way to build a DIY cold plunge?+
A Rubbermaid 150-gallon stock tank ($320 at Tractor Supply) filled with water and ice is the cheapest functional setup. Fill the tank with water, add 40-80 lbs of ice to reach 55°F, and you are ready to plunge. Ongoing costs are ice only - $15-$40 per session depending on local ice prices and ambient temperature. Total setup: $320-$400 including the tank, a thermometer, and basic water care.
Can you use any stock tank as a cold plunge?+
Most agricultural stock tanks work. Rubbermaid structural foam tanks are the most popular choice - they are made in the USA, BPA-free, and have been tested by thousands of DIY cold plungers. Galvanized steel tanks also work but can corrode over time with some water treatments, especially chlorine. Avoid PVC vinyl tanks, which can leach chemicals in cold water and are less durable. Tractor Supply, Rural King, and major farm supply stores carry Rubbermaid tanks in 50, 100, 150, and 300-gallon sizes.
How cold can a stock tank + chiller setup get?+
With a quality 1/4 HP chiller on a 100-gallon tank in a moderate climate (ambient under 75°F), you can maintain 50-58°F indefinitely. With a 1/2 HP chiller on the same tank, you can reach 45-50°F. In very hot climates (90°F+ ambient), even a 1/2 HP chiller may struggle to hold below 55°F on a non-insulated stock tank. Adding an insulated cover and foam board insulation to the tank exterior can reduce the chiller load by 30-40%.
How does a chest freezer cold plunge work?+
A chest freezer is converted to a cold plunge by waterproofing the interior (food-safe silicone sealant on all seams and the drain plug) and using it as the water vessel. The built-in compressor maintains cold temperatures without any external chiller. A controller (like an Inkbird ITC-308) is plugged between the freezer and the outlet to set the target temperature - the freezer's own thermostat cannot be set above 10°F, but the Inkbird lets you target exactly 50°F or 55°F without overriding the internal thermostat. The freezer interior must be fully sealed before adding water, and a submersible pump aids water circulation to prevent ice formation.
Is a chest freezer cold plunge safe?+
Yes, when built correctly. Key safety considerations: use food-safe sealant on all interior seams, ensure the drain plug hole is properly sealed with a pool plug or marine-grade fitting, use a GFCI outlet for electrical safety (water + electricity proximity requires it), and add a temperature controller so the water does not actually freeze. A submersible pump circulating water prevents ice pockets from forming. The chest freezer compressor is efficient at maintaining cold - lower monthly energy costs than an external chiller of equivalent cooling capacity.
How do you keep DIY cold plunge water clean?+
Without filtration, change water every 2-3 days. With a basic cartridge filter and pump, you can extend this to 1-2 weeks. For a complete DIY water care system: add a 200-400 GPH submersible pump, route water through a cartridge filter, and add an ozone generator or hydrogen peroxide (30ml of 35% food-grade H2O2 per 100 gallons of water). Test pH weekly and maintain 7.2-7.6. This setup keeps DIY cold plunge water safe for 3-4 weeks between full water changes. See our full water care guide for details.
How much does it cost per month to run a DIY cold plunge?+
Stock tank with ice: $50-$150/month in ice costs for daily use (varies enormously by local ice prices and climate). Stock tank with 1/2 HP chiller: $15-$35/month in electricity at average US rates, running 6-8 hours daily. Chest freezer conversion: $8-$20/month in electricity - the most energy-efficient option because the freezer insulation is excellent and the built-in compressor is sized for the job. All options have similar water care costs: roughly $5-$15/month in sanitizer and filter cartridges.
What is the best stock tank size for a cold plunge?+
The Rubbermaid 150-gallon tank is the most popular choice for adults. At approximately 5.6 feet long by 2.6 feet wide, it accommodates most adult body types for a fully reclined position. The 100-gallon is sufficient for a seated or semi-reclined position and requires less ice or a smaller chiller. The 300-gallon is too large for solo use and requires a much more powerful chiller. For most adults wanting to fully recline: 100-gallon minimum, 150-gallon optimal.
Can I build a cold plunge from an IBC tote?+
Yes. A 275-gallon IBC tote costs $150-$250 (or less used) and the food-grade HDPE variety is a valid water vessel. Most people cut the top open to sit inside, or build a plunge into the cage. The trade-offs: the plastic walls have poor insulation, the shape is boxy and less comfortable than a barrel or stock tank, and a used tote must have held only food-safe contents. For a powered build you still add a 1/6 to 1/3 HP chiller and a GFCI-protected circuit, so the tote mostly saves on the vessel, not the mechanical parts. A stock tank is easier to source and sit in for a similar total price.
Does a DIY cold plunge chiller or freezer need a GFCI outlet?+
Yes. Any powered build - chiller, pump, or converted chest freezer - must run on a ground-fault circuit interrupter (GFCI). Under the 2023 National Electrical Code, section 210.8(F) requires GFCI protection for outdoor outlets on typical residential circuits, and any outlet near water needs it regardless. Place the GFCI outlet at least 5 feet from the water and use a licensed electrician for a dedicated circuit if you are unsure. One caveat with chest freezer builds: compressors and defrost heaters can cause nuisance GFCI trips, so give the freezer its own dedicated GFCI circuit rather than sharing it with other loads.
Which DIY cold plunge build is the most durable?+
A galvanized or structural-foam stock tank is the most durable vessel. Stock tanks are built to hold water outdoors for 10-20 years with minimal care. Chest freezer conversions can last for years but the bare interior is not designed for constant submersion, so the seams must be sealed well and the compressor is not rated for the humidity a plunge creates. Inflatable tubs vary widely: budget models last 1-2 years while premium drop-stitch tubs last longer. IBC totes are durable as plastic but degrade in UV over time. If you want the longest service life, a stock tank with an external chiller is the safest bet.