Outdoor Cold Plunge: Siting, Weather, and Running It Year-Round
Choosing a tub is the easy half. The harder half is where it sits, how it survives August and January, and how you get power to it safely. This guide covers backyard placement, load and drainage, shade and chiller capacity, winter freeze protection, and the electrical rules that apply outdoors.
An outdoor cold plunge works year-round if you plan for both extremes. Put it on level concrete or compacted gravel, not an unreinforced deck, since a filled 100-gallon tub plus a person clears 1,300 lbs. Keep it shaded: direct sun adds roughly 20 to 30 percent to cooling demand, and a chiller loses an estimated 15 to 25 percent of capacity as ambient climbs from 70 to 95 degrees. Power it from a GFCI-protected, weather-resistant outdoor receptacle with an extra-duty in-use cover, never an extension cord. In winter, either keep water circulating and insulate every exposed hose run, or drain and winterize. Below about 45 to 55 degrees ambient you can usually turn the chiller off entirely.
Why most plunges end up outside
A cold plunge is a large open container of water with a refrigeration unit attached. Indoors that means condensation on cold surfaces, humidity in a room that was not built for it, a splash zone with nowhere to go, and a compressor humming inside the house. Outdoors those problems disappear. You also get free cooling for a large part of the year, which is the single biggest running-cost advantage of a backyard setup.
What you trade is exposure. The vessel has to tolerate UV, rain, and frost. The plumbing has to survive a hard freeze. The electrics have to be rated for a wet location. And the water picks up leaves, pollen, and sunlight-driven algae in a way indoor water never does. None of that is difficult, but all of it needs deciding before you fill the tub, because a filled plunge is effectively immovable. This page is about those decisions. If you are still choosing the vessel itself, start with the stock tank build, the DIY cold plunge tub guide, or the chest freezer conversion.
Backyard siting checklist
Walk the yard with this list before you commit to a spot. Most regrets about an outdoor cold plunge setup trace back to one of these six items, and every one of them is far cheaper to fix before the tub is full.
Level concrete, a paver pad, or compacted gravel. A tub that sits even slightly out of level puts uneven stress on the shell, leaves one end shallow, and makes a fitted cover sit badly. Check with a long level in two directions before you fill, because once there is water in it you are not moving it.
You will drain and refill periodically, and you will splash every session. Site the plunge where runoff flows away from the house foundation, not toward it, and not onto a path that will ice over. Gravel beds, lawn edges, and existing yard drains all work. Avoid dumping treated water repeatedly onto the same patch of planting.
Every extra foot of tubing is more heat gain in summer and more freeze exposure in winter. Keep the chiller close, on its own level pad, with clear airflow around the condenser. Do not box it into an unventilated cabinet, because a chiller rejecting heat into a sealed enclosure fights itself.
A pergola, an awning, the north side of a building, or a mature tree that is not directly overhead. Shade cuts both the solar load on the water and the ambient temperature the chiller condenser has to work against. If natural shade is not available, a shade sail is the cheapest fix.
A GFCI-protected outdoor receptacle within reach, weather-resistant, with an extra-duty in-use cover. If there is nothing suitable nearby, get an electrician to add a dedicated circuit. This is the one part of an outdoor plunge that should never be improvised.
You will be stepping out wet, cold, and slightly uncoordinated. Add a non-slip surface, a sturdy step or grab point, and a light you can switch on before you get in. In winter the path from the door to the tub is a genuine ice hazard, so keep it short and salted.
Weight, base, and the deck question
Water weighs 8.34 lbs per gallon. That number turns an innocent-looking tub into a structural load surprisingly fast, and it is why the deck question comes up in every backyard plunge thread. Here is what a few common volumes actually weigh once filled, before you add the person.
The problem is not the total weight so much as the concentration. Building codes generally set the minimum design live load for a residential deck at 40 psf, with about 10 psf of dead load on top. Structural write-ups for cold plunges put a typical 80 to 120-gallon unit somewhere around 90 to 110 psf over its own footprint, which is well past that design figure. Decks fail at connections and joists, not in a dramatic collapse you can see coming.
The safe defaults, in order: an existing concrete slab or patio, a paver pad set on compacted base, or four to six inches of compacted gravel screeded flat. If you want the plunge on a deck, treat it like a hot tub installation. That means additional footings and posts under the tub footprint, doubled or tripled joists, and in most jurisdictions a permit and an engineer sign-off. Balconies are almost always a no without professional assessment.
Sun, ambient heat, and why shade is a chiller upgrade
A chiller does not have a fixed cooling output. It rejects heat into the surrounding air, so the hotter that air gets, the less work it can do. Sizing guides for cold plunge chillers estimate a loss of roughly 15 to 25 percent of capacity as ambient rises from 70 to 95 degrees Fahrenheit, which effectively turns a 1 HP unit into something closer to 0.75 HP on a hot afternoon. That is the same afternoon your water is gaining the most heat.
Direct sun compounds it from the other side. Radiant load on an exposed tub is commonly estimated to add 20 to 30 percent to cooling requirements, which is why outdoor sizing recommendations skew a full step higher than indoor ones. Most manufacturers also publish an ambient operating range, typically somewhere between about 40 and 105 degrees, and running near the top of that band shortens compressor life as well as costing more.
Cover the water. An open surface is where most heat gain enters, with common estimates putting 60 to 70 percent of total heat exchange through the top. An insulated cover on whenever you are not in the tub is the highest-value change you can make.
Shade the tub and the chiller. A pergola, awning, shade sail, or the shaded side of a building removes the radiant load and lowers the air the condenser draws in. Shade the chiller too, not just the water.
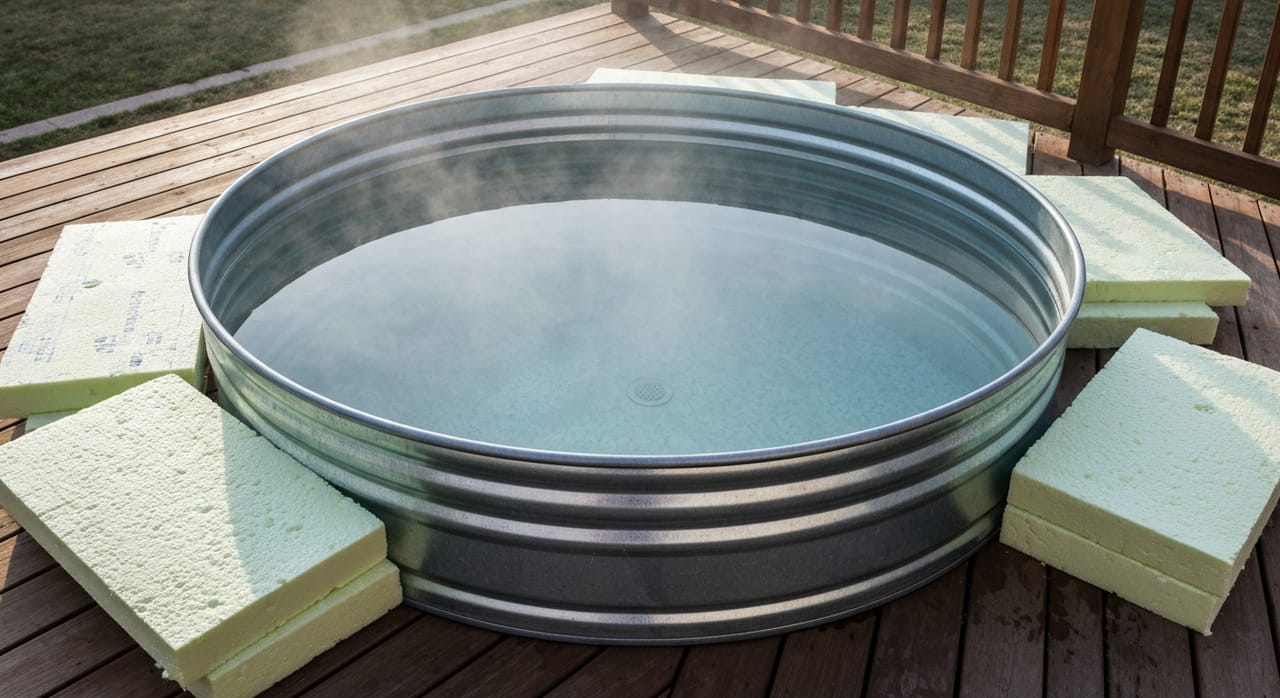
Insulate the shell and the lines. Foam board around the vessel and closed-cell sleeves on the hose runs. Insulation is often credited with reducing the chiller size you need by 30 to 50 percent, and it works in both seasons: the same jacket that keeps summer heat out keeps winter freeze risk down.
Practical takeaway on sizing: if the tub lives in full sun in a hot climate, size the chiller one step up from what an indoor calculator suggests, or spend the difference on shade and insulation instead and keep the smaller unit. Our chiller sizing guide walks through horsepower against volume in detail.

A fitted insulated cover plus rigid foam board around the shell is the cheapest way to cut chiller runtime outdoors and reduce freeze exposure in winter.
Running a cold plunge outside in winter
Winter is the season people worry about and the season that is actually easiest, as long as you understand what is at risk. The water in a large insulated vessel is not the fragile part. Standing water in a thin hose, a filter housing, or a pump head is. Those freeze first, ice expands, and the result is a cracked line or a split housing you discover at the next refill.
Do you even need the chiller?
Usually not. Standard plunge temperatures sit around 45 to 55 degrees, and once ambient settles into that same band the outdoor air does the work for free. Manufacturers routinely advise that below roughly 45 to 55 degrees ambient the chiller becomes unnecessary, and below freezing it is counterproductive. Many chillers are rated only down to about 41 degrees ambient, with low-ambient models going further, so running one in a hard freeze can be outside its design envelope anyway. If you want a target to aim for, our cold plunge temperature guide covers the useful range.
Two winter strategies
Keep it running. Moving water is much harder to freeze than still water, so leave the circulation pump on continuously through cold snaps even with the chiller off. Insulate every exposed run with closed-cell foam pipe sleeves, which give roughly R-3 per inch, and pay particular attention to the filter housing, which is commonly the first component to ice up. In harsh climates add self-regulating heat cable, often sized around 5 to 8 watts per foot, on a thermostatically controlled outlet so it only draws power when it is genuinely cold. Reported experience is that exposed tub-to-chiller lines start freezing overnight once air temperatures dip below about 25 degrees, so that is the threshold to plan against, not zero.
Or drain and winterize. If you are away, if power is unreliable, or if you simply do not plunge in the coldest months, empty the system properly rather than half-heartedly. Drain the tub, then drain the pump, the chiller loop, the filter housing, and every hose, and leave drain plugs out so nothing traps a pocket of water. Store removable components somewhere frost-free and keep the cover on the empty tub so it does not fill with rain, snow, and leaves. Partial draining is the worst outcome, because the water you left behind is exactly the water that cracks a fitting.
One more winter reality: a plunge that sits under snow load needs a cover that can take it, and a lid that ices shut is a real annoyance at six in the morning. Brush snow off rather than letting it compact and refreeze.
Electrical safety outdoors: GFCI is not optional
This is the part of an outdoor plunge that deserves the most respect. You are combining mains-powered refrigeration and pumping equipment with a large volume of water, a wet person, and rain. Ground fault protection is what stands between a nicked cord and a serious injury.
The 2023 National Electrical Code, section 210.8(F), requires GFCI protection for outdoor outlets at dwelling units supplied by single-phase branch circuits rated 150 volts to ground or less and 50 amperes or less. The 2023 edition also broadened the scope beyond dwelling outdoor outlets to include at-or-below-grade garages, accessory buildings, and boathouses. Worth knowing: in code language an outlet is any point where current is taken to supply equipment, so hardwired outdoor equipment is covered, not just plug-in receptacles. Code adoption varies by state and municipality, so confirm what edition your jurisdiction enforces.
Required for outdoor outlets at dwellings under 2023 NEC 210.8(F). Test the device monthly using its test button, and again after any storm.
Outdoor receptacles must be WR-rated and in a weatherproof enclosure. A standard indoor receptacle in an outdoor box is not compliant.
Where exposed to weather, the cover must seal with a cord plugged in, and it must be extra-duty rated. A flip-up bubble cover that only closes when empty is not enough.
Let the cord sag below the receptacle before it rises to the plug so water runs off the low point instead of tracking into the connection.
Chillers and pumps are continuous loads. Extension cords overheat, degrade outdoors, and add two unprotected connections. If the receptacle is out of reach, move the receptacle.
A dedicated GFCI circuit run to the plunge location is a few hundred dollars and is the correct fix. Do not improvise this one.
Two habits worth building. Never handle plugs, cords, or the chiller with wet hands straight out of the plunge, and route cords where they will not be walked on, mown over, or buried under snow. If a GFCI trips repeatedly, that is information, not a nuisance. Something is leaking current and it needs diagnosing before you plug it back in.
Covers, debris, and outdoor water care
Outdoor water gets dirty in ways indoor water does not. Leaves and pollen blow in, insects land, rain dilutes your sanitizer and shifts pH, and sunlight on the water feeds algae. A fitted insulated cover solves most of it at once. It blocks debris, blocks UV, cuts evaporation, and slashes the heat gain that drives chiller runtime. If you buy one thing for an outdoor plunge beyond the tub and chiller, buy the cover.
Evaporation is the quiet cost. An uncovered tub in dry, sunny, or windy conditions loses noticeable volume week to week, and every top-up dilutes your chemistry and forces a retest. Covering between sessions keeps the level stable and keeps your dosing predictable.
Siting helps too. Keep the plunge clear of directly overhanging deciduous trees, which drop leaves, sap, and pollen straight into the water. Shade from a structure is better than shade from a canopy for exactly this reason. Run filtration daily, test on a schedule rather than by eye, and rinse off before getting in, since body oils and sunscreen are the main organic load. The full routine, including sanitizer choices and change intervals, is in our guide on how to keep cold plunge water clean.
Privacy, lighting, and the walk back inside
The details that decide whether you actually use a backyard plunge are unglamorous. Privacy comes first: if the tub is in view of a neighbouring window, you will use it less. A slatted screen, a hedge, a fence panel, or simply tucking the tub against the house solves it. Check local rules before building anything tall, since fence and screen heights are often regulated.
Lighting matters more than people expect, because the best plunge windows in winter are before sunrise and after sunset. A low-level fixture on the path and a light near the tub, both switchable from the door, remove the main friction. Any outdoor lighting near the plunge should be on properly protected outdoor circuits, same as the chiller.
Then plan the exit. Somewhere dry and close for a towel and robe, a non-slip mat or decking surface underfoot, and the shortest possible route back to warmth. Rewarming outdoors in cold air is fine and arguably part of the point, but stepping onto icy pavers with numb feet is how people get hurt. Keep the route short, keep it clear, and keep it lit.
Outdoor plunge: pros and cons
Outdoors is the right place for almost every home cold plunge. You avoid the humidity and drainage problems of an indoor install, and for several months a year the weather cools the water at no cost. The three things that decide whether it works are the base, the shade, and the power.
Put it on a slab or compacted gravel, not an unreinforced deck. Get shade and a proper insulated cover over the water before you buy a bigger chiller. Have a GFCI-protected, weather-resistant outdoor receptacle installed by an electrician. Then in winter, either keep the water circulating with insulated lines and heat cable where needed, or drain the system completely. Get those right and an outdoor cold plunge runs year-round with very little fuss.